Setting up new Paginated UX and customizing ADFS 5.0 on Windows Server 2019
Microsoft has added the new Paginated Sign-in experience on their ADFS 5.0 user interface which looks closely to the feel of Azure AD. This is also called Centered UX which gives users more consistent sign-in experience.
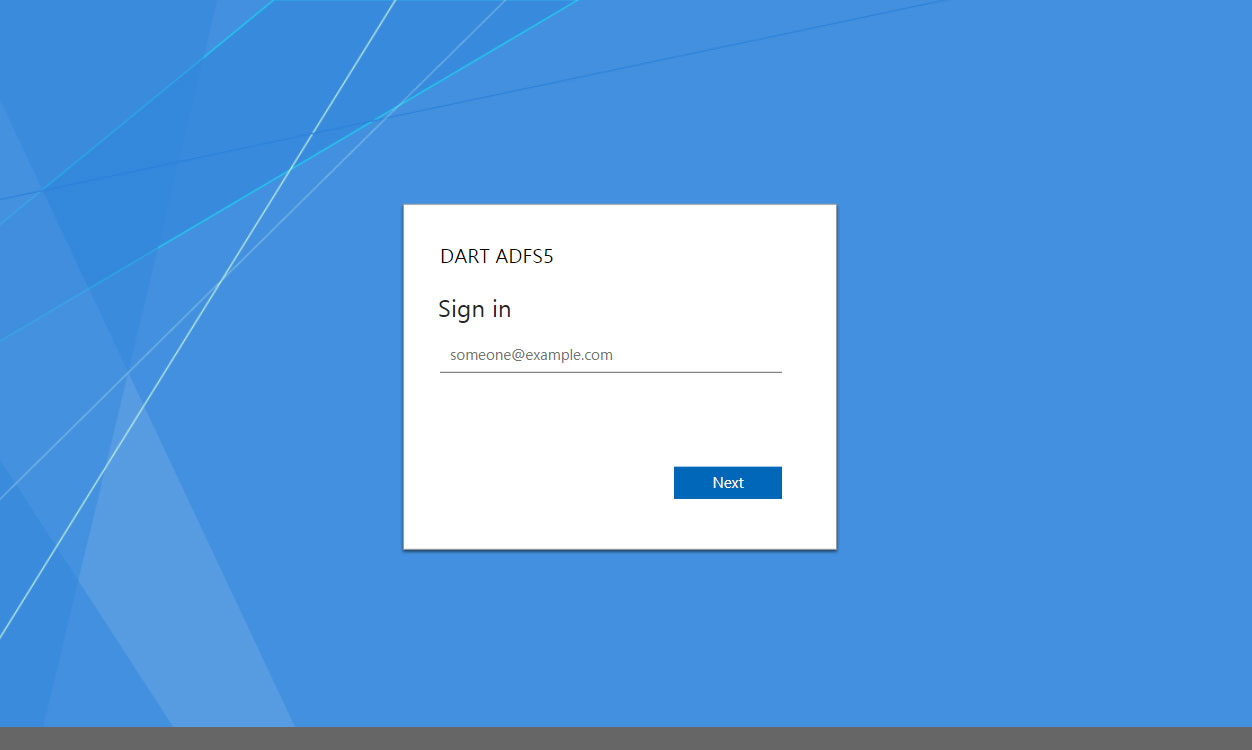
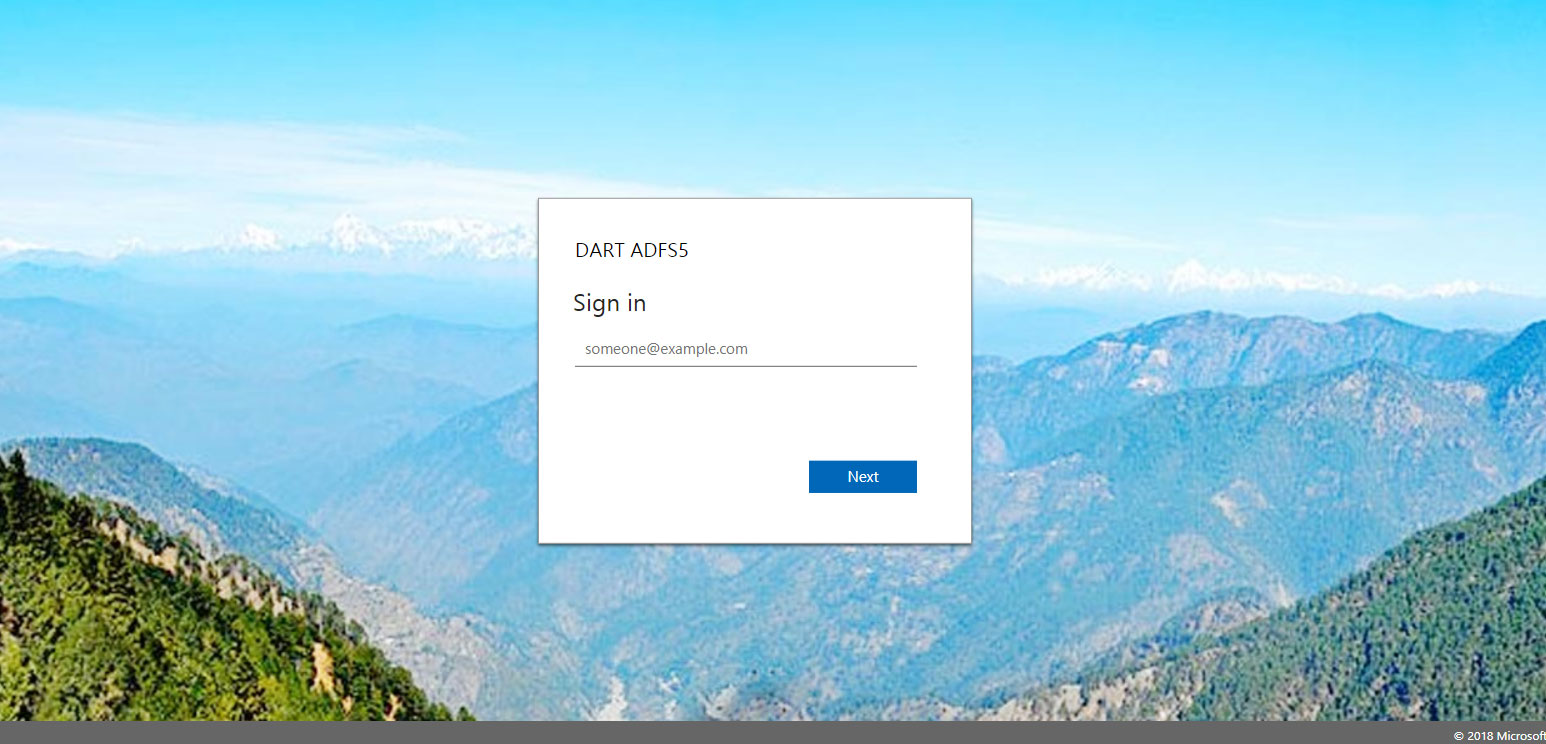
You can refer below screens for how the default Centered UX for ADFS 5.0 will look once enabled.

- Go to your ADFS system and open Powershell in administrator mode (Run as administrator).
- I assume you have already setup your ADFS ldp sing on page. If not do it now with below command.
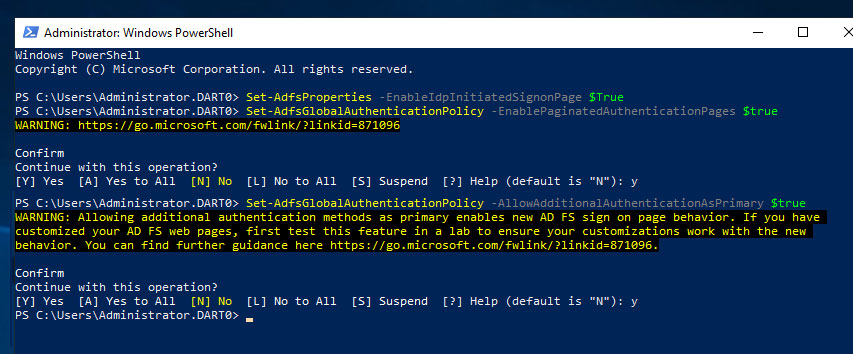
Set-AdfsProperties -EnableIdpInitiatedSignonPage $true
- Now use below command to enable Paginated Sign-in UI.
Set-AdfsGlobalAuthenticationPolicy -EnablePaginatedAuthenticationPages $true
- Give y to confirm.
- Enable external authentication as primary via Powershell using below command.
Set-AdfsGlobalAuthenticationPolicy -AllowAdditionalAuthenticationAsPrimary $true
- Type y to confirm.
- Your powershell windows should look like below.
Now go and refresh your browser where you can see the new Centered UI.
OK, now let’s make a simple customization to change the look. I am going to change the background as an example.
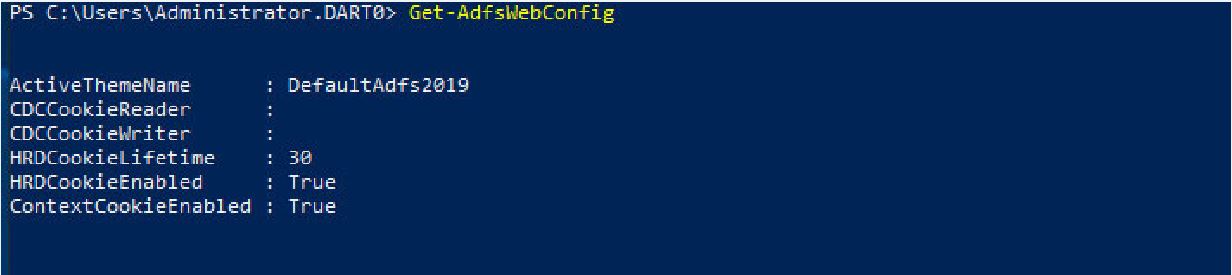
Type the command “Get-AdfsWebConfig” in your powershell. You can see the new theme called “DefaultAdfs2019”. This is the new theme set as default for your paginated UI.
Let’s start the customization.
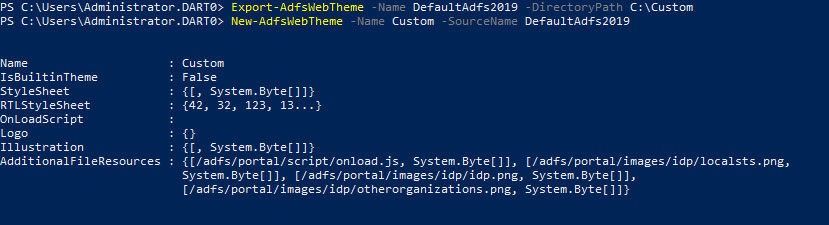
- We need to export the theme first. Use below command and specify the directory as you wish.
“Export-AdfsWebTheme -Name DefaultAdfs2019 -DirectoryPath C:\Custom”inistrator mode (Run as administrator).
- After successful export you could see the theme assets in the directory you specified. We will use this directory to change css or pull in the new assets during customization.
- Let’s duplicate the default theme to our own. I am naming the new theme as Custom. Feel free to name it on yours.
“New-AdfsWebTheme –Name Custom –SourceNameDefaultAdfs2019”
- You can see the info of new theme on the powershell upon the command above.
- You are now ready add your custom element and push into your custom theme.
- I am taking a background image and placing it on the “c:/custom/images/custom” directory. Note you may place it anywhere but just to keep it organized I have created a folder called custom under the images and placed my image called “background.jpg”
- The below command will push the new asset into ADFS theme repository.
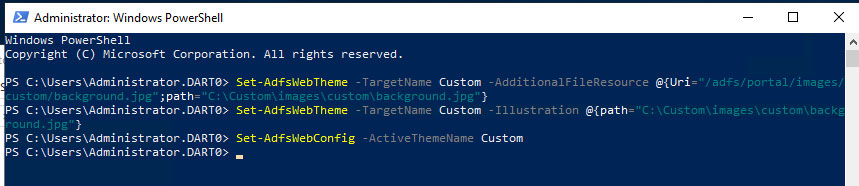
Set-AdfsWebTheme -TargetNameCustom -
AdditionalFileResource@{Uri=”/adfs/portal/images/custom/background.jpg”;path=”C:\Custom\images\custom\background.jpg”}
- Now set the new background image for our custom theme using below command.
Set-AdfsWebTheme -TargetNameCustom -Illustration
@{path=”C:\Custom\images\custom\background.jpg”}
- Now let’s set our Custom theme as the ADFS theme.
Set-AdfsWebConfig -ActiveThemeNameCustom
Now go and refresh your browser where you can see your new background reflected.
That’s it!! You can make more customization such as fonts, colors, logo and other elements to your custom theme.