Responder Policy – Customizing NetScaler logon page specific to URLs using Responder Policy
The scenario is probably you are hosting multiple Virtual Gateway servers (VPN) in a single NetScaler appliance for your customers. And you want to provide different User Interface to each customer with their own branding. For example you want to place their own logos or copyright info or anything specific to each customer. Though NetScaler allows to host multiple Virtual Gateways and configure different URLs it doesn’t allow you to place different themes to each VPN gateways by default. You can only do this using the responder policy. In other terms you are redirecting the customers to specific VPN pages based on the URL.
You can configure different authentication methods and other policies from the Gateways itself. For example a customer may have LDAP only auth and another customer may need LDAP with RADIUS auth. This is possible by the gateway configuration itself. You will see the 2nd password when you enable Radius policy in the same interface. Though all these are possible providing specific interface design to customers can’t be done from the Gateway configuration. The reason is NetScaler uses only one theme as common for all Virtual Gateway servers. Hence it is only possible by duplicating your VPN HTML pages and configuring responder policy with redirect action. Perhaps it is only few steps and not much complicated.
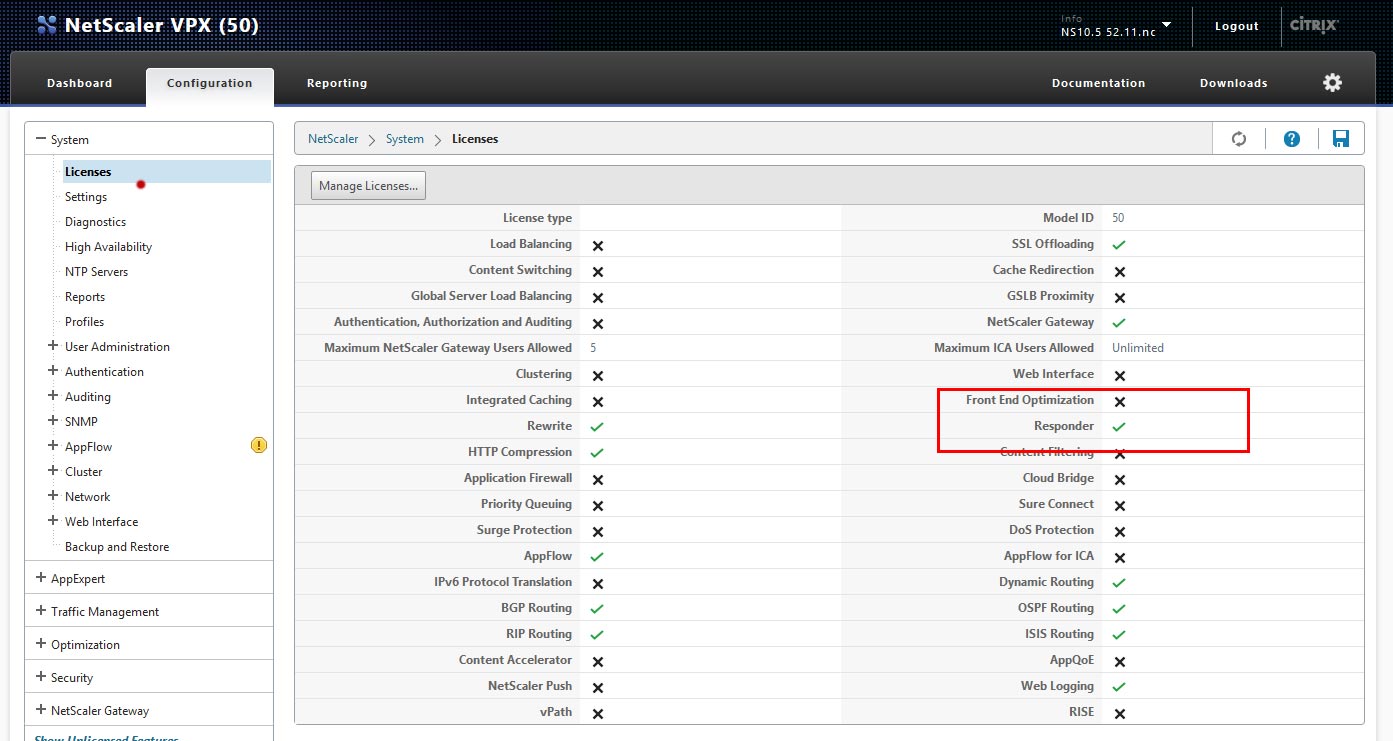
Prerequisites:
Scenario:
I have 2 companies (ABC & XYZ) uses different gateway URLs namely abc.mynetscaler.com and xyz.mynetscaler.com. Now I am going to provide a specific custom branded interface for the customer ABC and leave the default theme for XYZ.
Steps to achieve it:
- Login to your NetScaler Appliance via SFTP and navigate to VPN (/netscaler/ns_gui/vpn) folder.
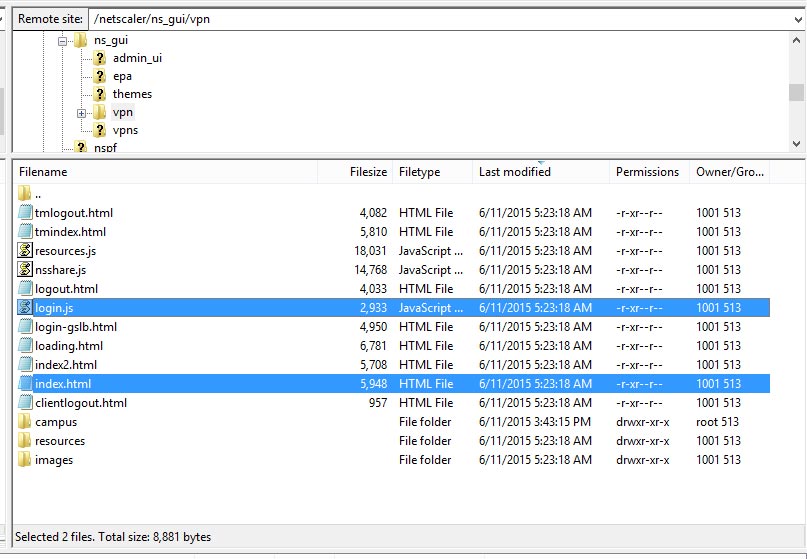
- Make a copy of login.html and rename it to login-abc.html. Same like, login.js has to be duplicated to login-abc.html.
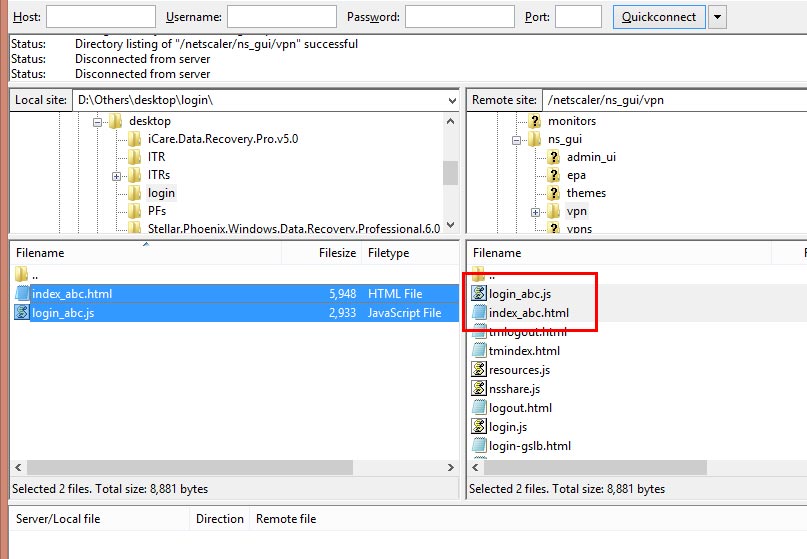
- Now edit your login_abc . html to point out new login_abc . js. Go to line number 18 and change this.

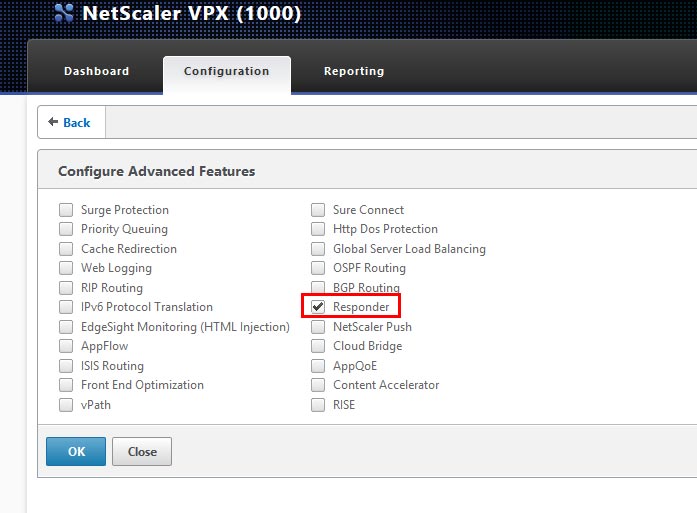
- Go to your NetScaler GUI, System >> Settings >> Configure Advanced Features.
- Check the Responder option.
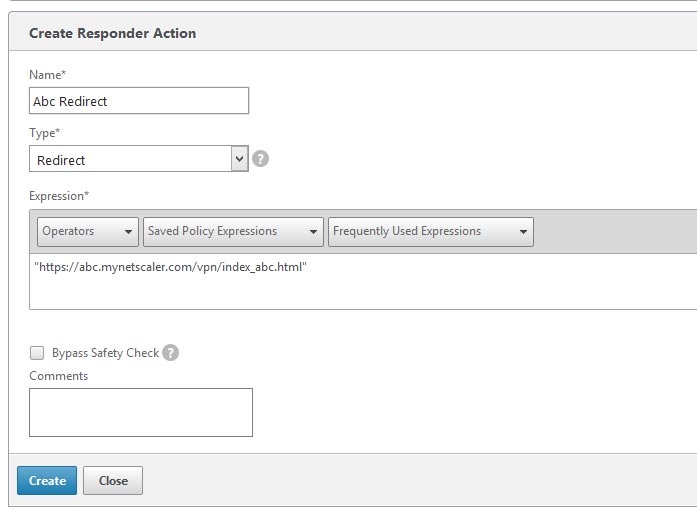
- Now go to App Expert >> Responder >> Actions.
- Provide the name of your option (ex: Abc Redirect)
- Select Type as Redirect from the dropdown.
- Write this on your expression field https://abc.mynetscaler.com/vpn/index_abc.html
- Now go to Policies and Add Policy.
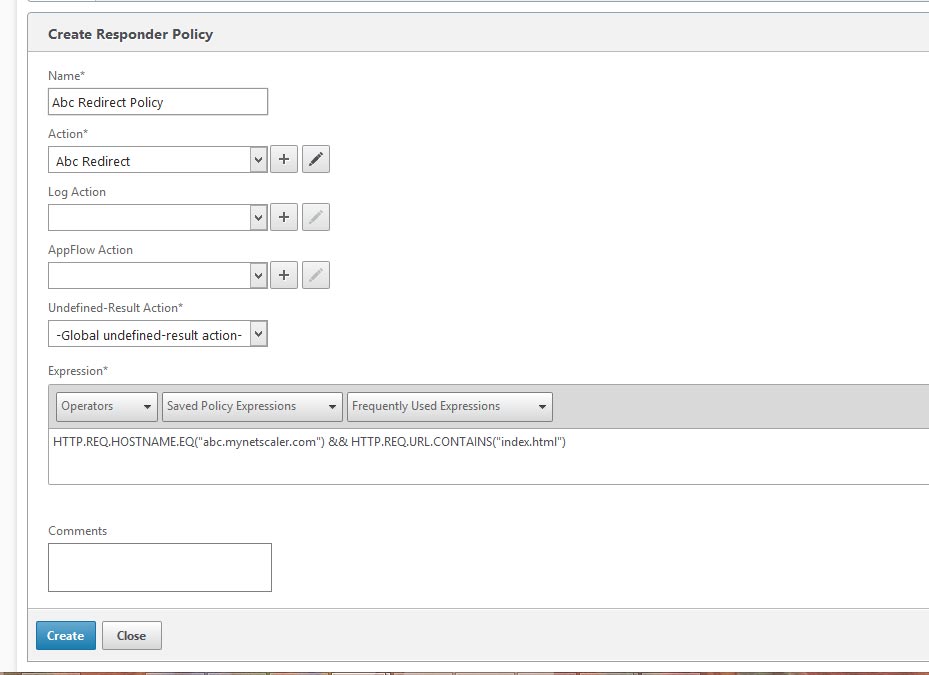
- Name the Policy of your Choice.
- Select the Action you have created just before.
- Write down this in the expression field.
HTTP.REQ.HOSTNAME.EQ(“abc.mynetscaler.com”) && HTTP.REQ.URL.CONTAINS(“index.html”)
Note: Instead of copying the above text write on your own as NetScaler may throw some error because of the symbols used in above statement. Also remember to replace the URL (abc.mynetscaler.com) to yours.
To bind the policy globally, complete the following steps.
- Go to Responder > Policies > Click Policy Manager.
- Select Default Global and leave the protocol as http.
- Click Continue and bind the policy you just created.
To bind the responder policy on a Virtual Appliance
- Edit your Virtual Appliance.
- Click Add Policy from the policies block.
- Select Responder under the Choose Policy Dropdown. And Continue
- Select the Policy(s) and bind.
Now you are done. Your ABC Company will redirect to the index_abc.html and xyz should direct to the default html page. Go ahead with your own branding works on the Custom HTML pages.
You may not explore the full functionality of Forgot Password, Forgot Username and few others with the demo user due to the restriction we have set. However you can request for a full featured personalized demo by leaving your request here >>.
Would you be interested in customizing NetScaler Gateway interface? Click Here to read more >>
