Setting up ManageOTP nfactor authentication schema with NetScaler 14.1
Create AAA Virtual server
- Go to Security>> AAA Application Traffic >> Virtual Servers.
- Click Create Add
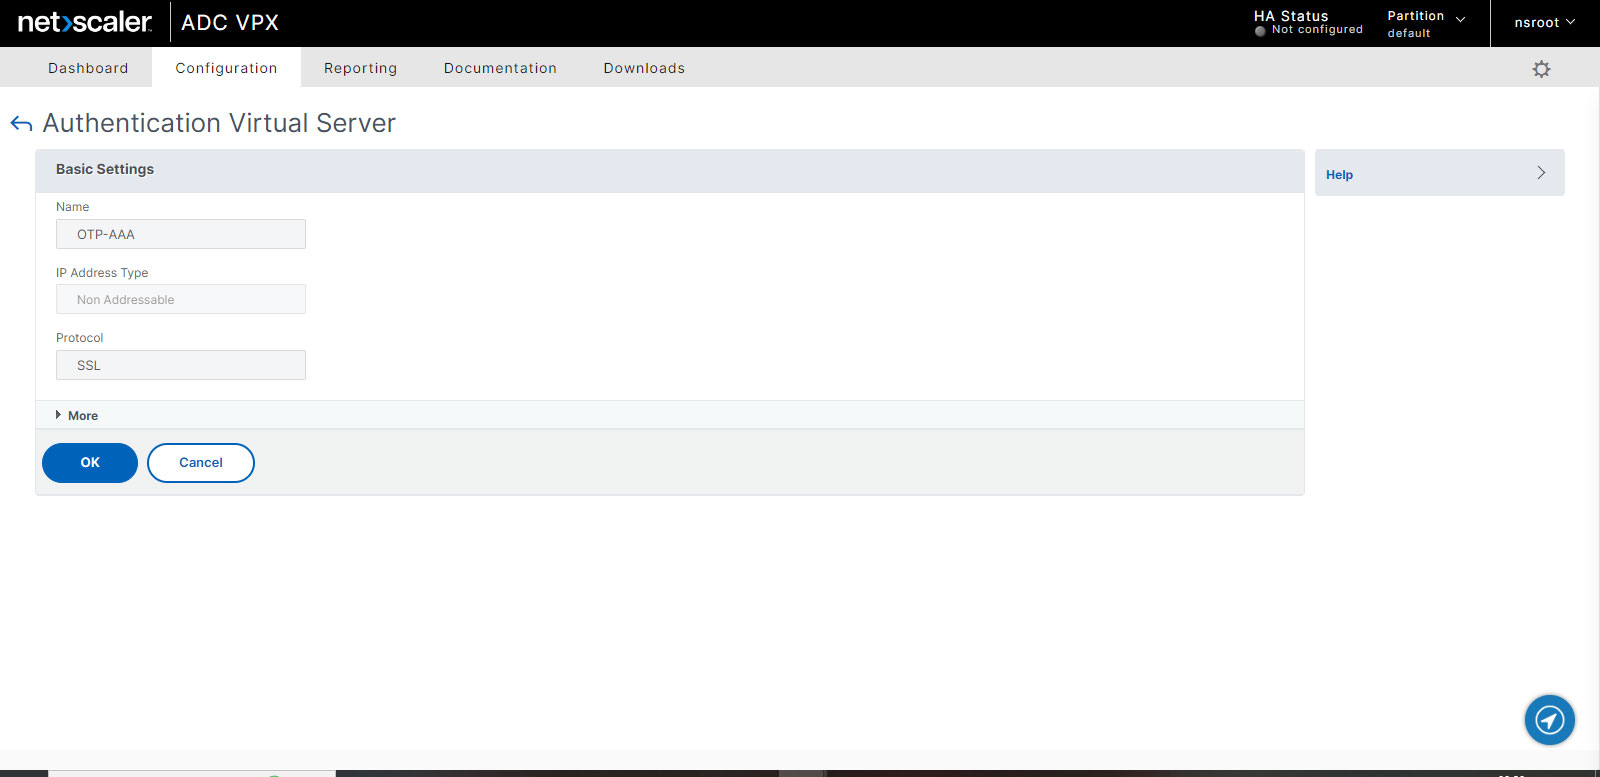
- Set a name, Ex: OTP-AAA
- Set Non Addressable under IP Address Type
- Click OK
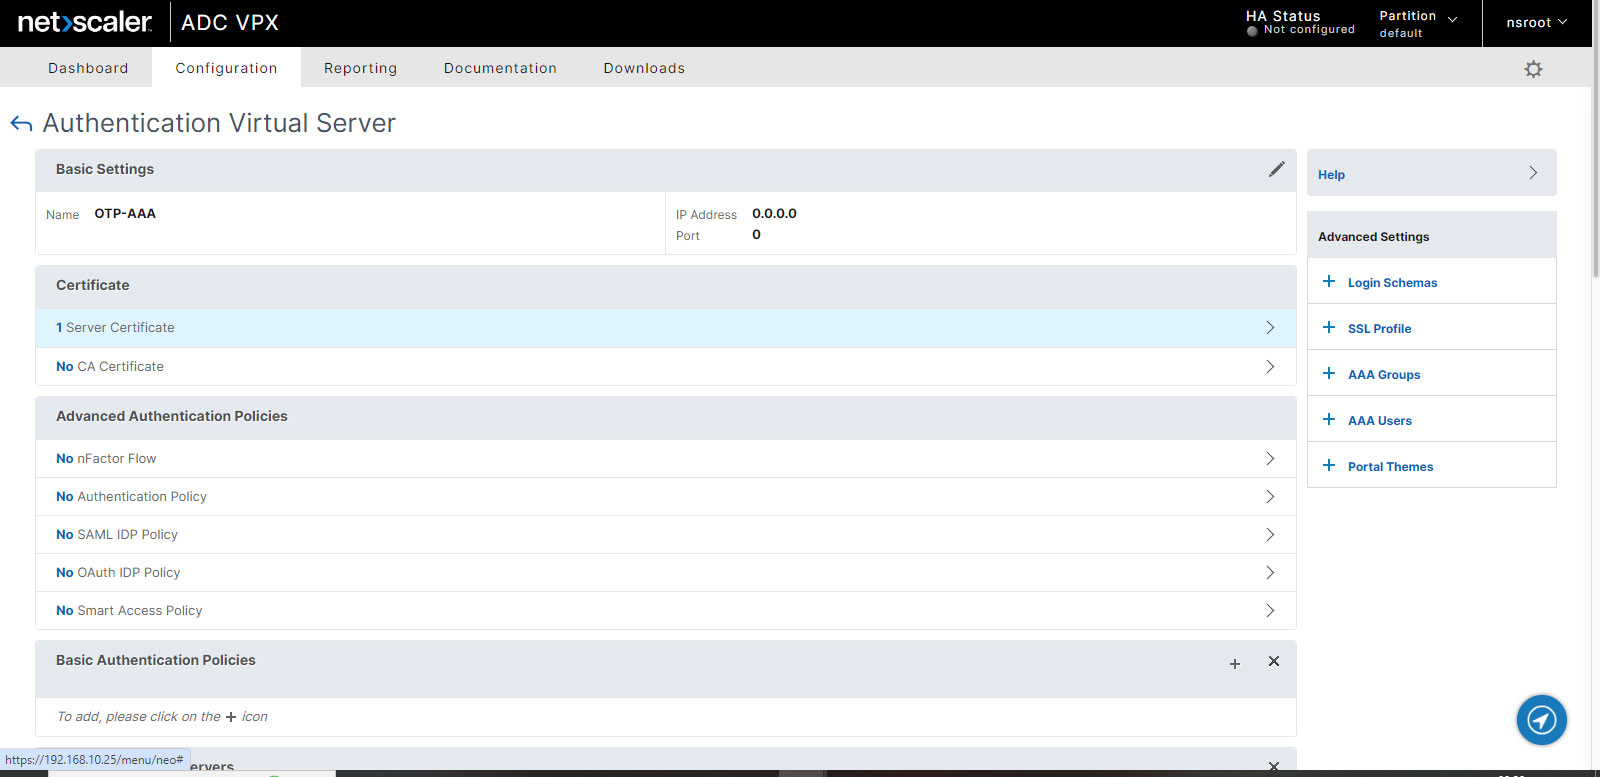
- Add your server Certificate at above screen and leave everything as they are.
- Click Done or use back button.
That’s it, we will add nfactor flow to this AAA Server later.
Create LDAP Authentication Servers
We will be adding 3 LDAP actions to accomplish this.
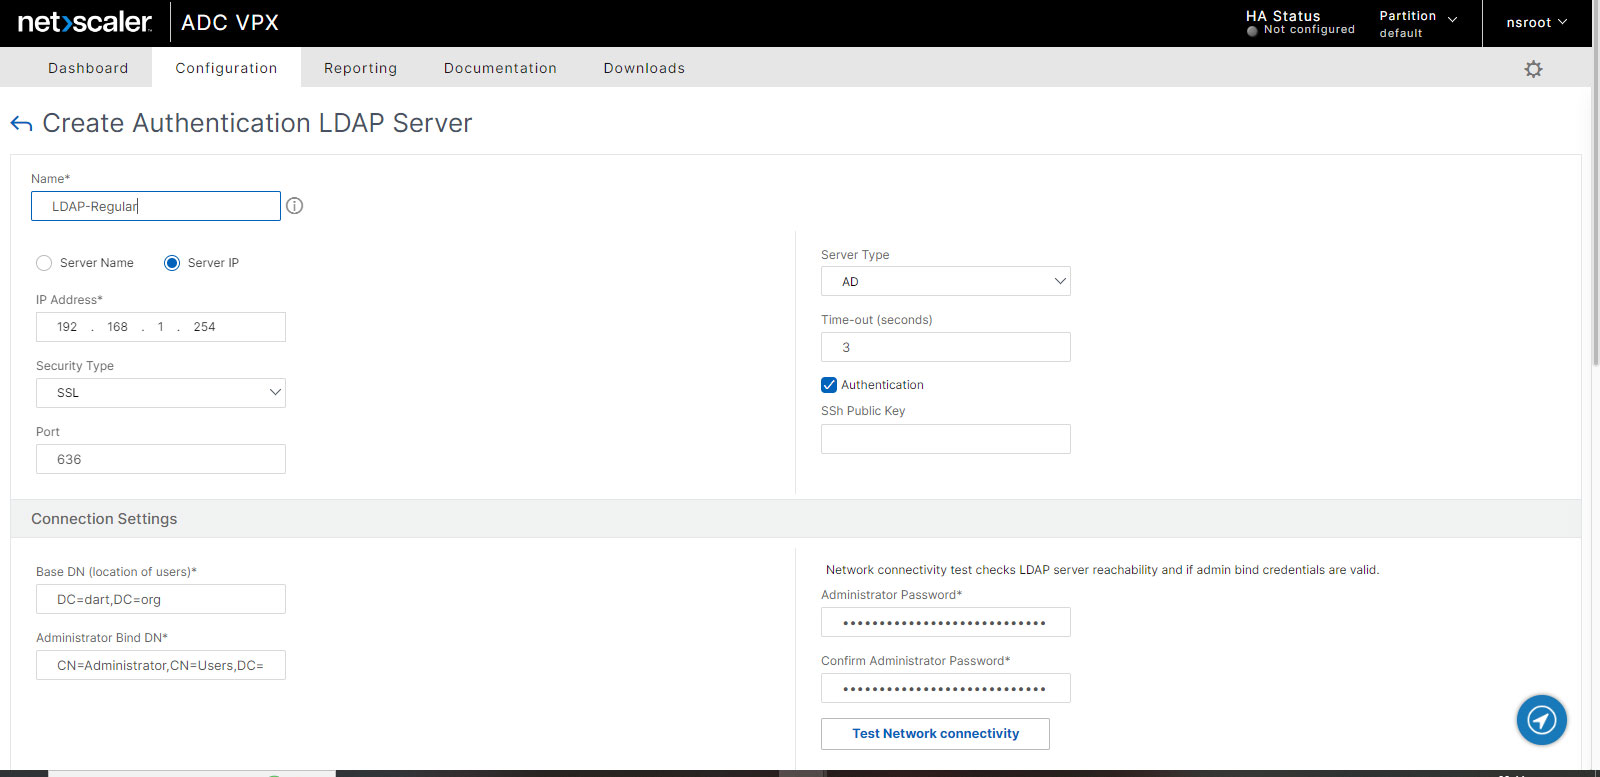
Create Normal LDAP Server
- Go to Security > AAA – Application Traffic > Policies > Authentication > Advanced Policies > Actions > LDAP.
- Create a normal LDAP Server with just Authentication enabled. Leave rest of the options as default.
Create LDAP Action for OTP Device Registration
- Under LDAP Actions Click Add
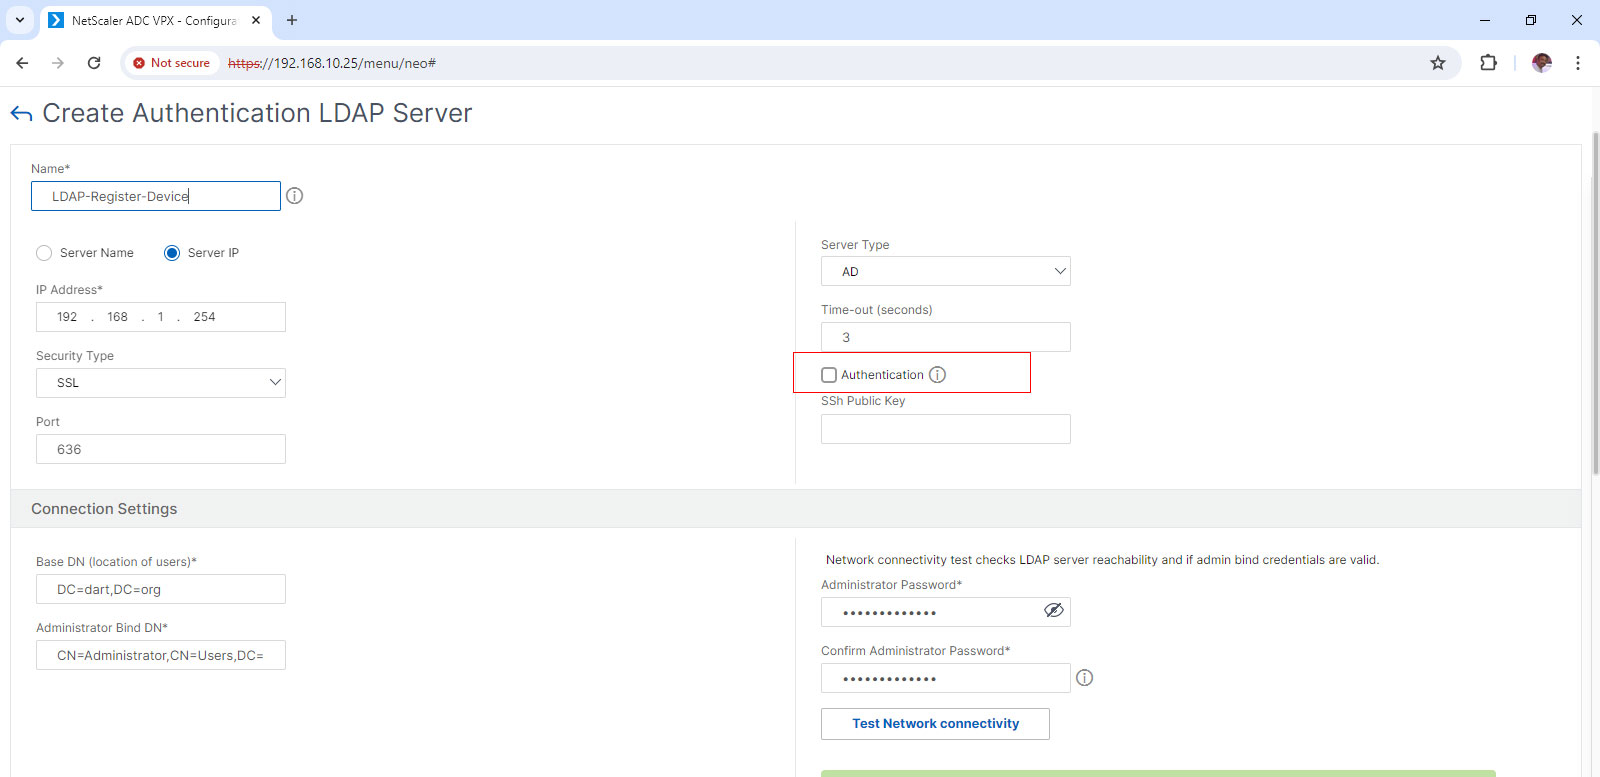
- Uncheck the Authentication field.
- In the Other Settings Tab you have enter an AD attribute name under OTP secret filed. We use userParameters for it.
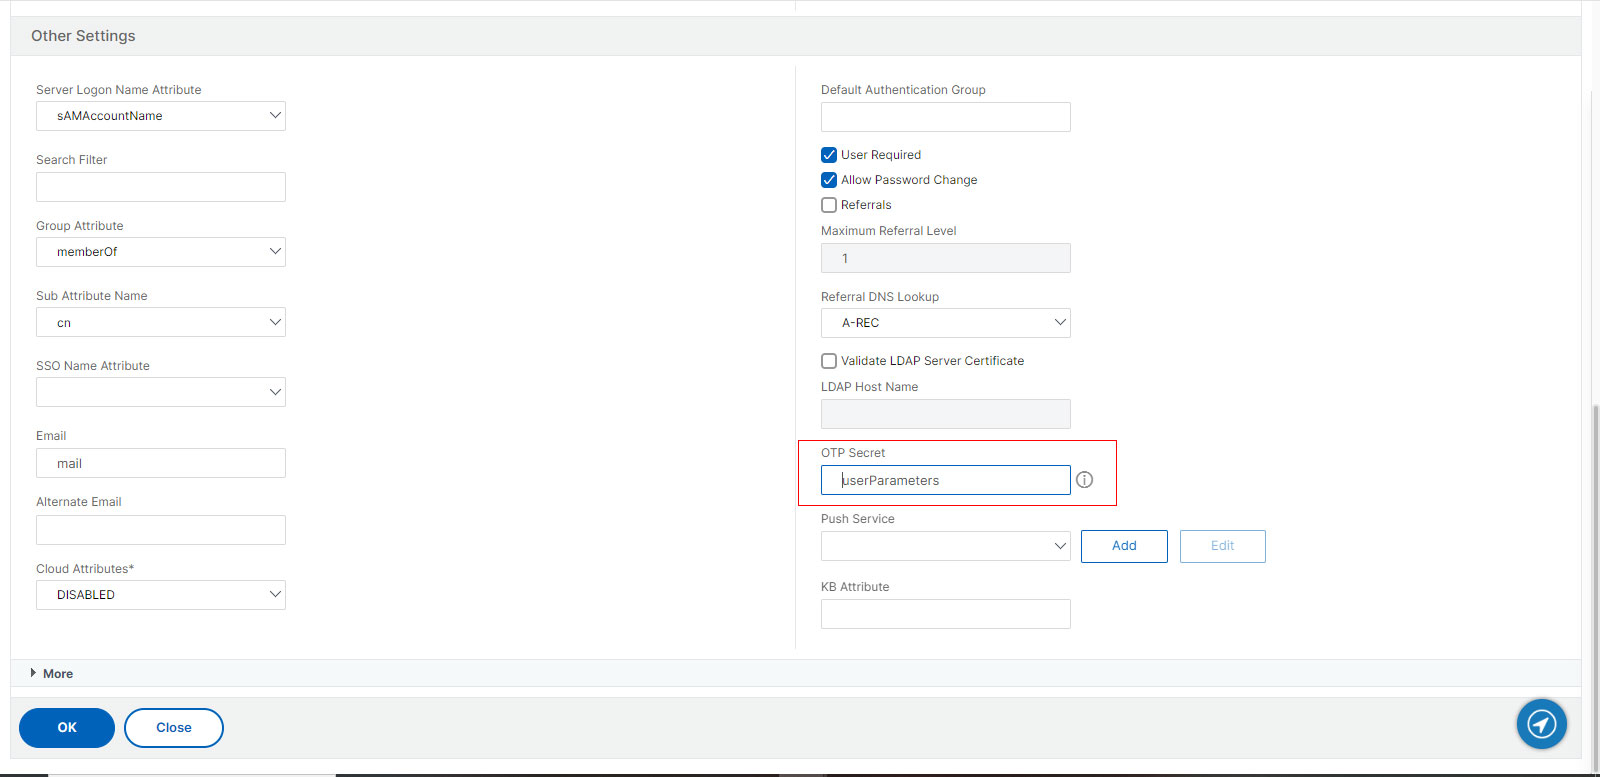
- Click OK.
Create LDAP Action for OTP Authentication
- Under LDAP Actions Click Add
- Repeat your settings just exactly like the 2nd LDAP action.
- Under Other Settings in Search Filter field add userParameters>=#@
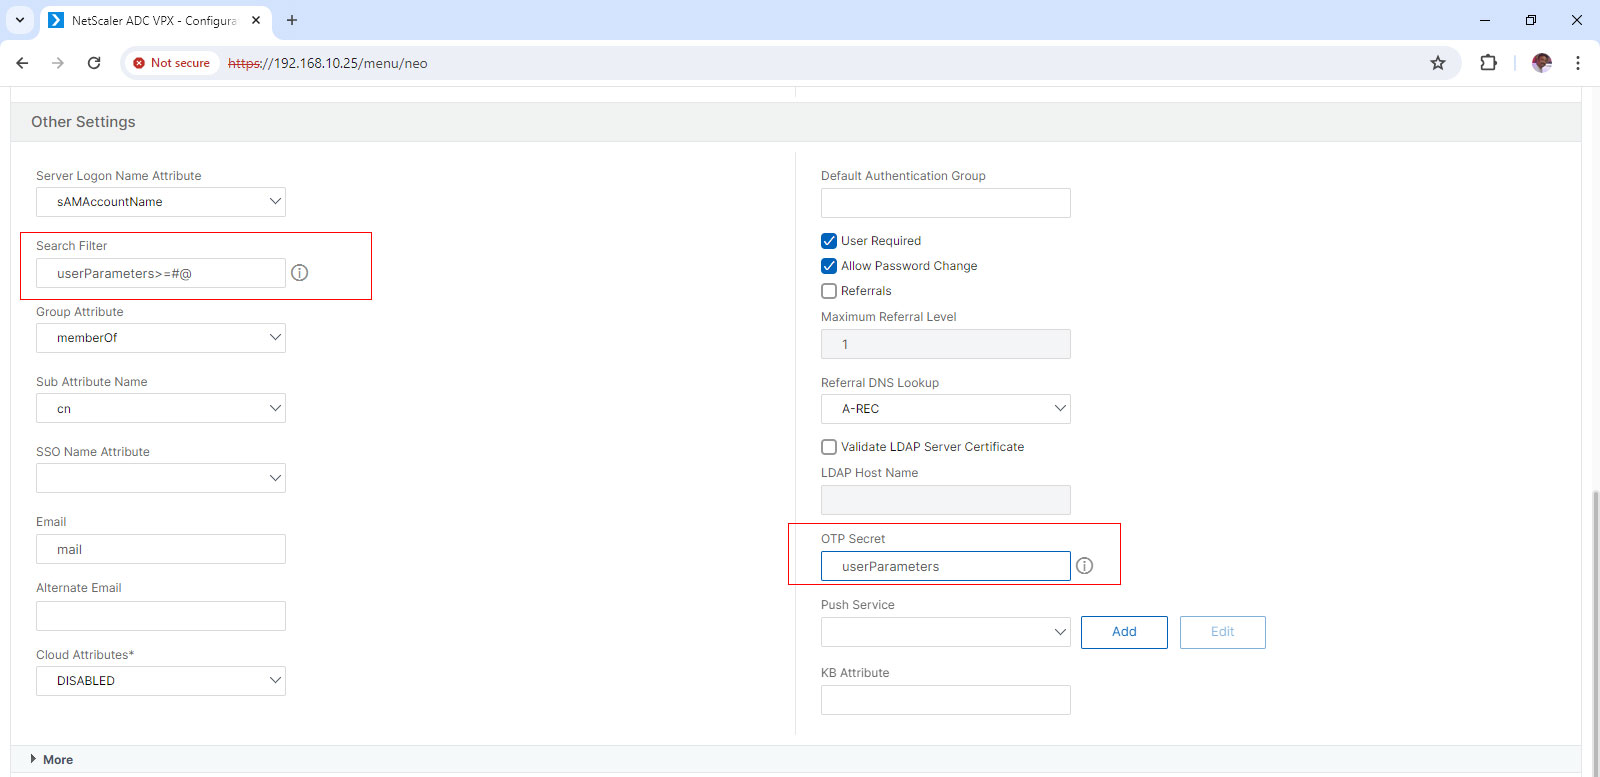
- Click OK and complete.
nFactor Flows
Create First Factor Flow that selects Manage or Authenticate
- Go to Security > AAA – Application Traffic > nFactor Visualizer > nFactor Flows. Or search the menu for nFactor.
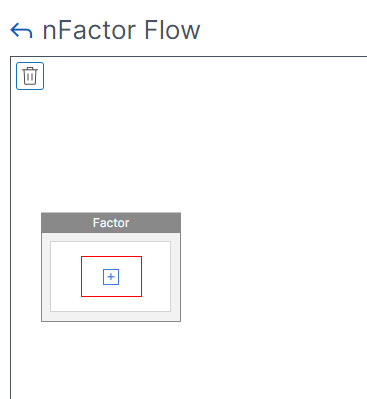
- click Add.
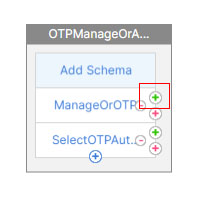
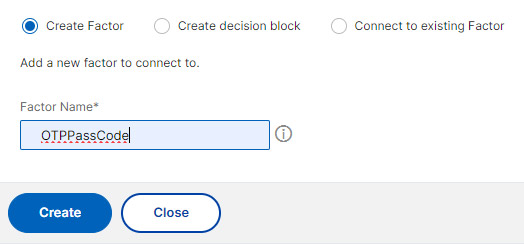
- Click the blue plus icon to create a factor.
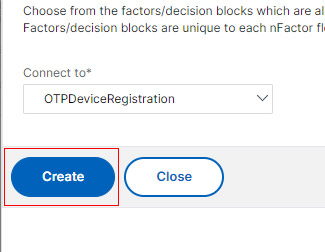
- Name the factor based on this goal (Ex: OTPManageOrAuthenticate). And click Create.
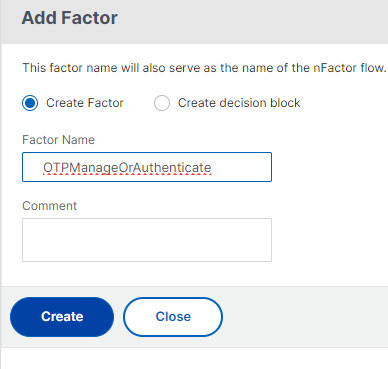
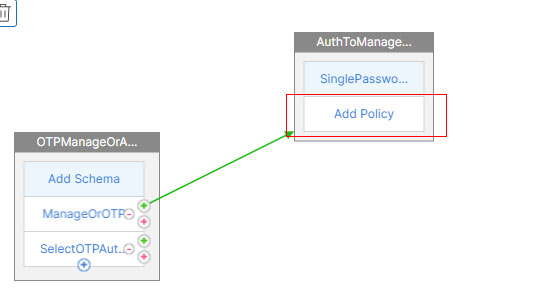
- Click the blue Create button and then Add Policy link.
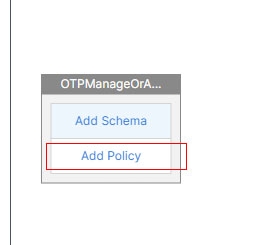
- Name your Policy based on the goal (ex: ManageOrOTP since this decides to move manageOTP page or OTP authentication page.
- Select NO_AUTHN from the Action Type Drop down.
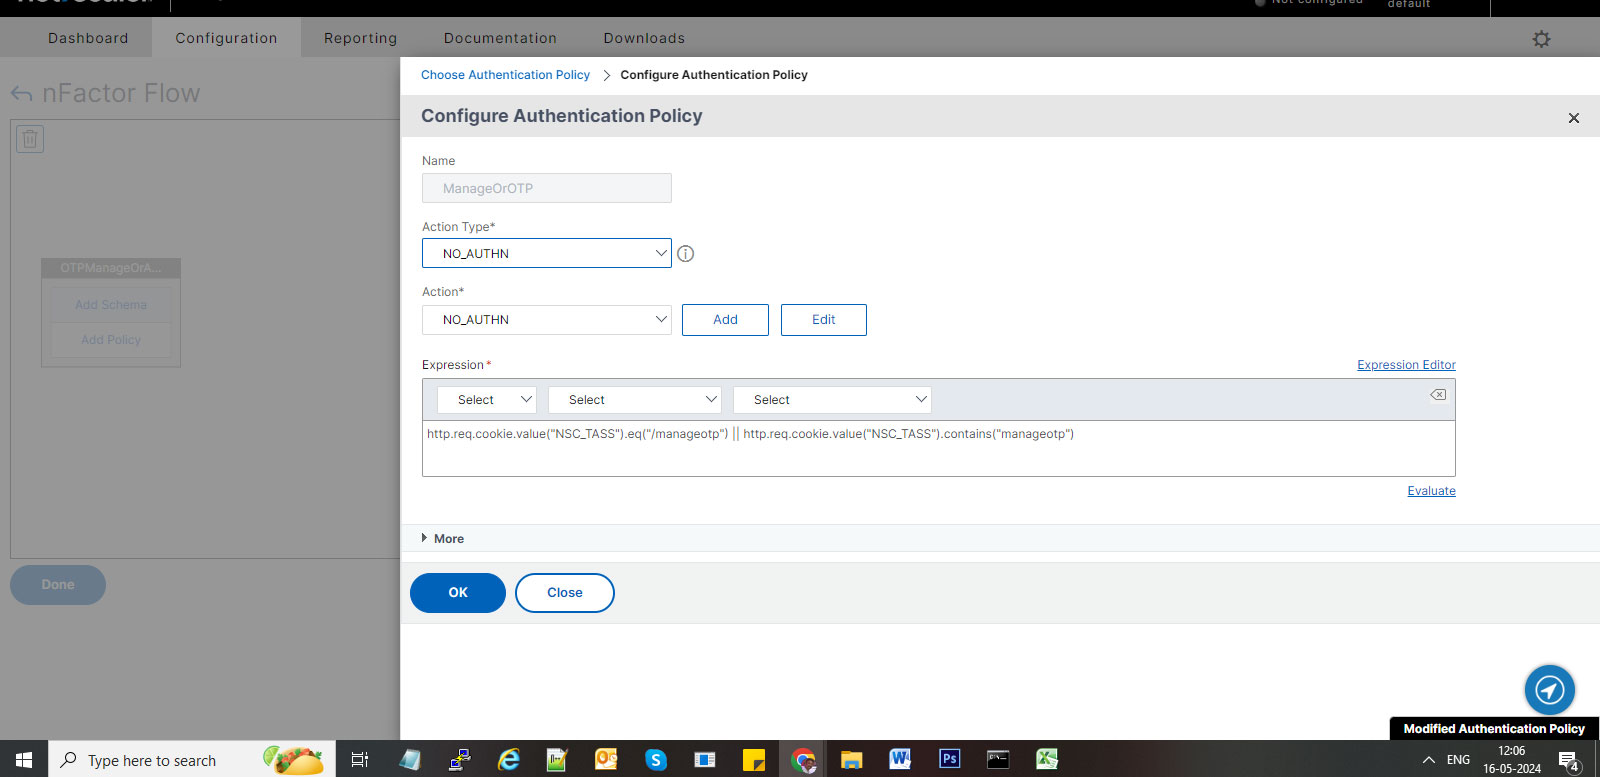
- Insert below expression in the expression editor.
http.req.cookie.value ("NSC_TASS").eq("/manageotp") || http.req.cookie.value("NSC_TASS").contains("manageotp")
- Click OK and then Click Add.
- In the first factor, below the policy you just added, click the blue plus icon to create another policy.
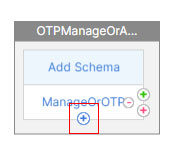
- Click Add to create another policy.
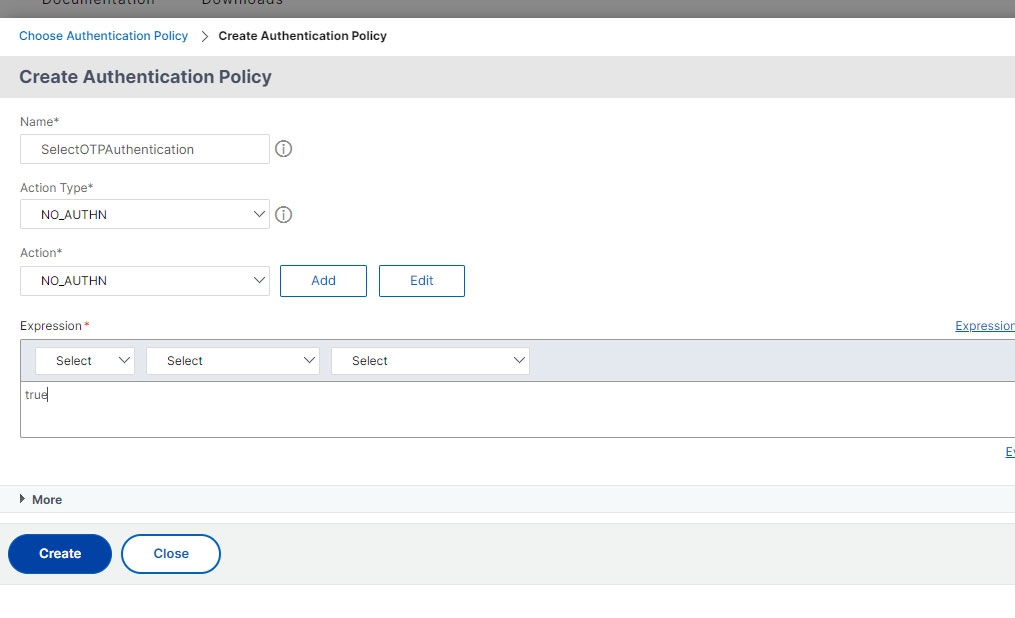
- Name the policy (Ex: SelectOTPAuthentication).
Create second factor for manageotp
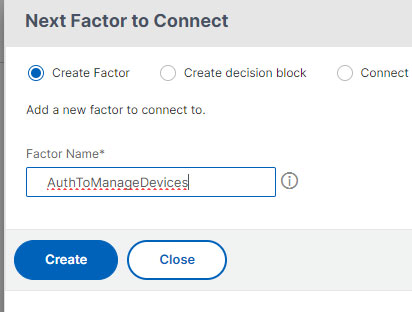
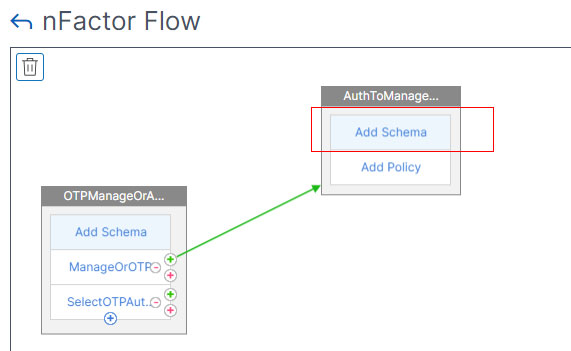
- In the first factor, click the green plus icon to the right of the “ManageOrOTP” policy. If the “ManageOrOTP” policy is true, then this new factor will be evaluated.
- Name it and Click Create.
- In the second factor click on the Add Schema button.
- Click Add to create a login schema.
- Click LoginSchema which will expand the schema (.xml) files.
- Select SingleAuthManageOTP.xml file.
- Click Select button at the right.
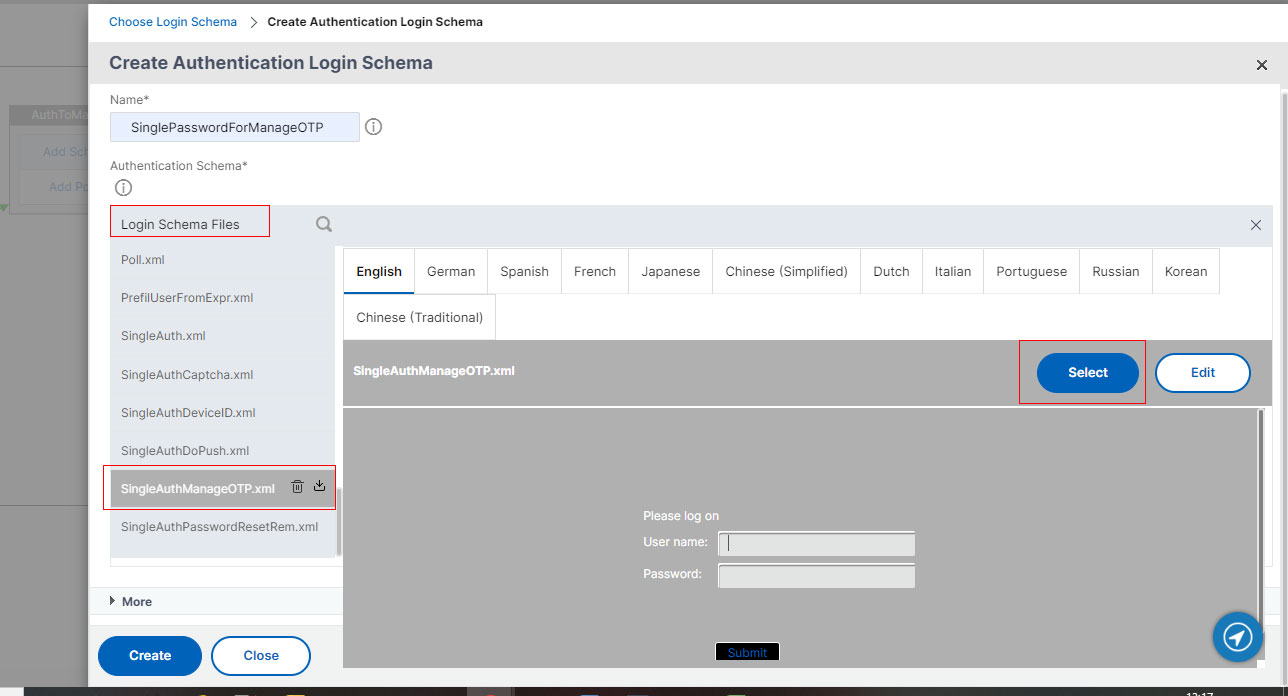
- Now click the Create button at next screen and then OK button.
- In the 2nd Factor, click Add Policy.
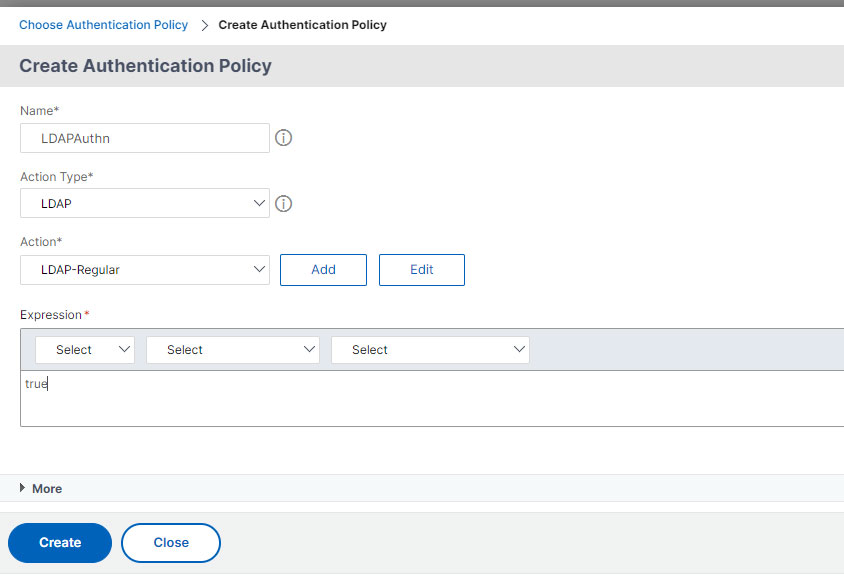
- Click Add under the Select Policy.
- Name this policy, select LDAP under the Action Type.
- In the Action drop-down, select the LDAP Action/Server you created earlier that performs normal authentication.
- In the Expression box, enter true, and click Create.
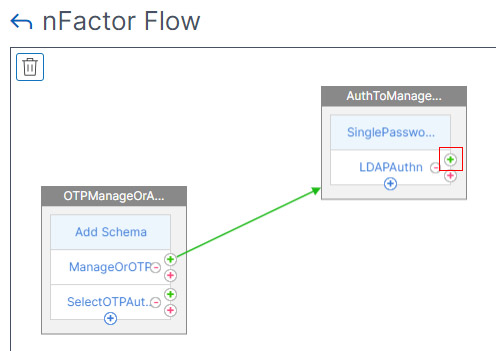
- In the next screen, click Add to bind this LDAP Policy to the factor.
Create third factor that registers an OTP device with Active Directory
- In the second factor, click the green plus icon to create another factor. This new factor is only evaluated if the LDAP Policy is successful.
- Name the Factor and Click Create.
- In the 3rd Factor click Add Policy
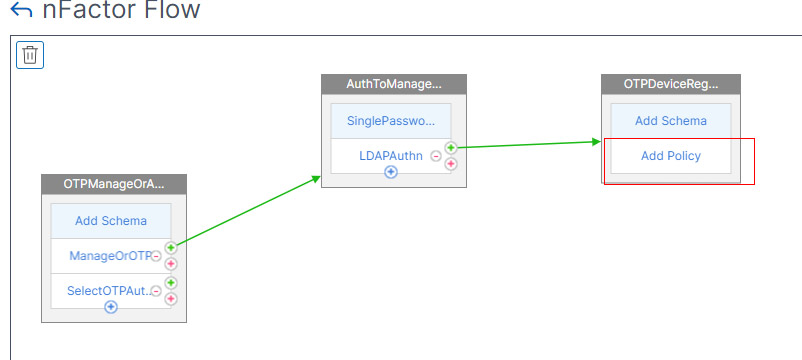
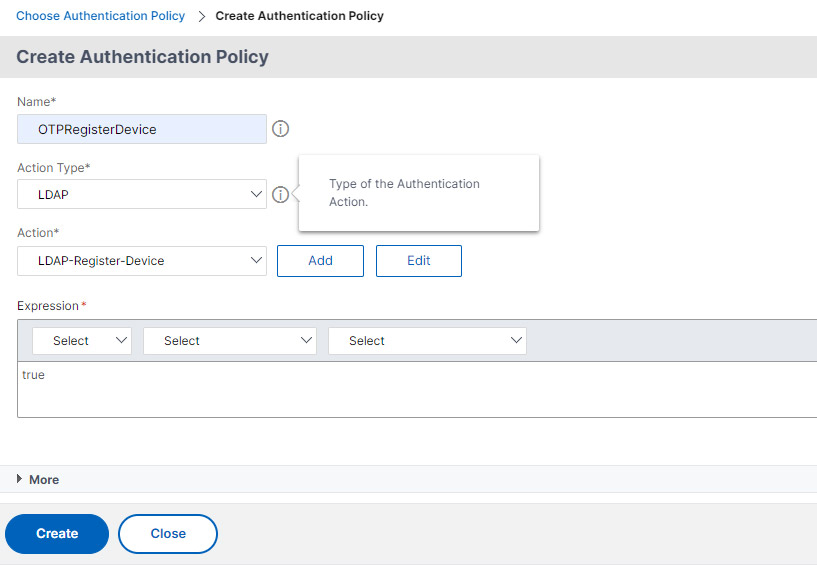
- Name the Policy and Select Action Type as LDAP.
- Select the LDAP action we created for the Device Registration.
- Set the expression as true and click Create.
- Click Add in next screen.
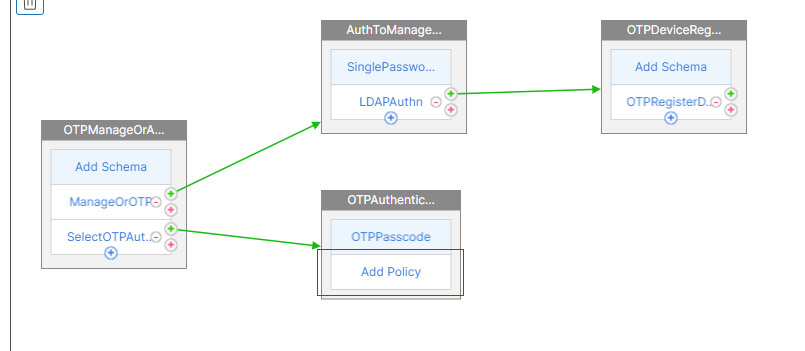
The Factors for manageotp are complete. Now we will create the factors for authenticating using OTP.
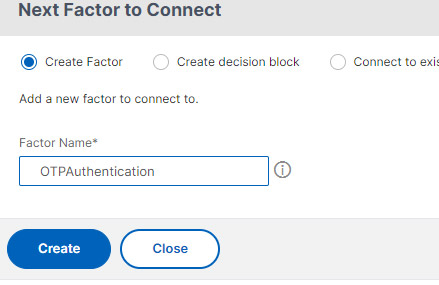
Create a second factor for LDAP Authentication
- Now click the plus button near to SelectOTAuth.
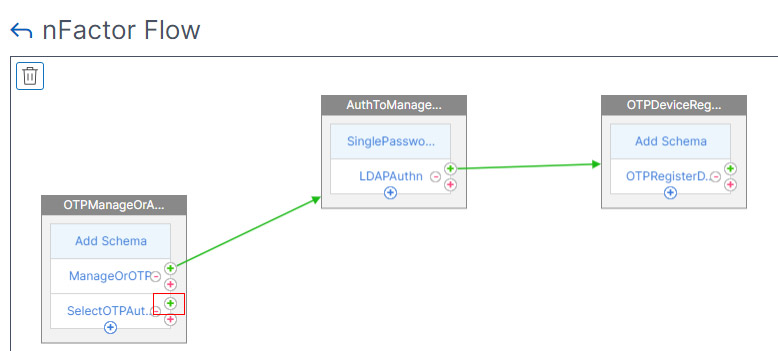
- Name it and Click Create.
- In the second factor, click Add Schema
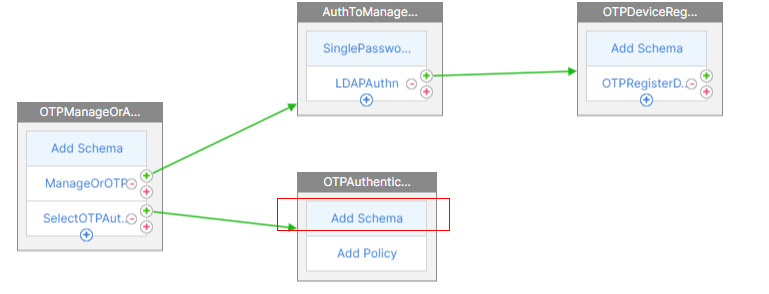
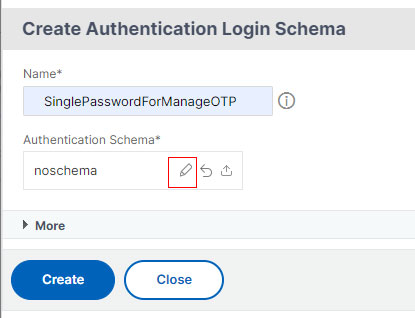
- Click Add under the Choose Schema page.
- Name it and click on the Pencil icon.
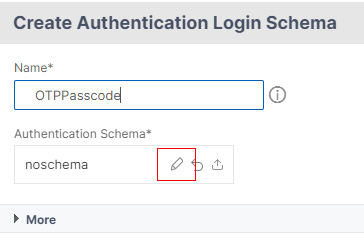
- Click the LoginSchema >> DualAuth.xml. And click Select..
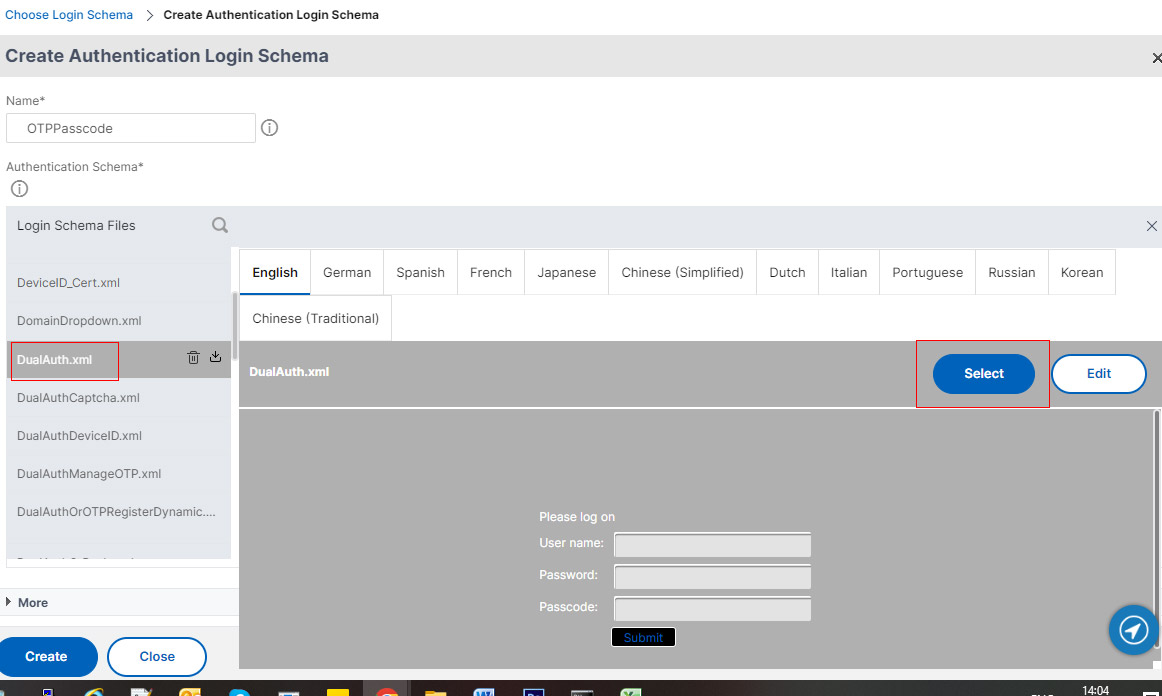
- In the schema page click More and set 1 for Password Credential Index.
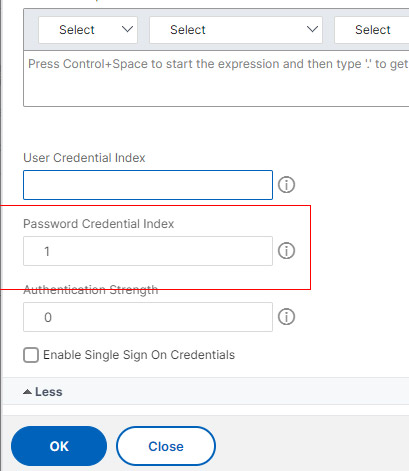
- Click Create then OK.
Note: You have to use DualAuthandPush.xml if you are using Push.
- Click Add Policy under the 2nd Factor Authentication Policy.
- Choose the same Policy you used for the Manage OTP in previous step.
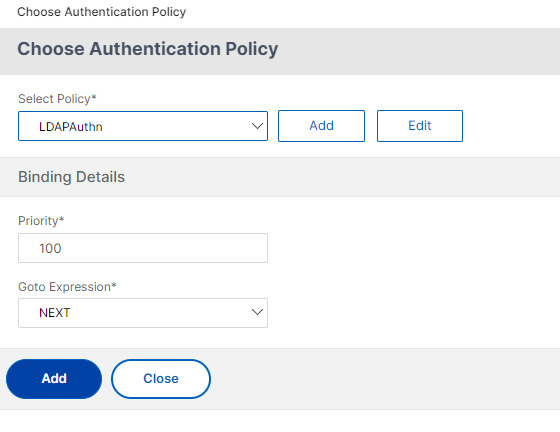
- Click Add to bind the policy.
Create third factor to perform OTP authentication
- Click on the Plus button near to the 2nd factor LDAP Auth.
- Just name it and click Create.
- This third factor does not need a Login Schema. So just click on Add Policy.
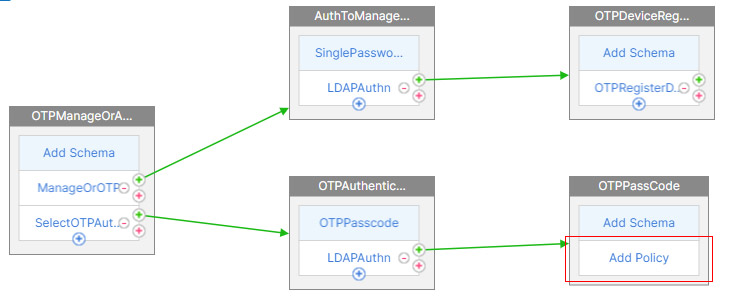
- Name the policy and select LDAP in Action Type.
- Choose the OTP specific LDAP Auth policy we created. (the one with search filter)
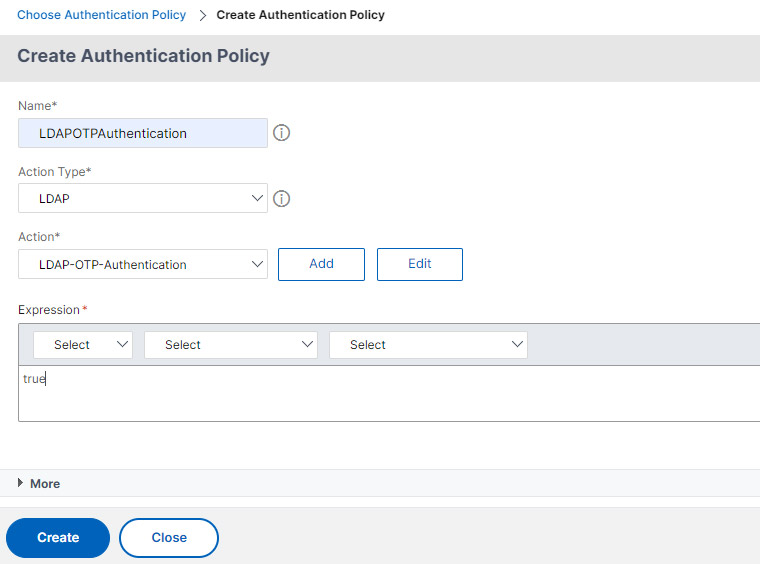
- Click Create and then Add.
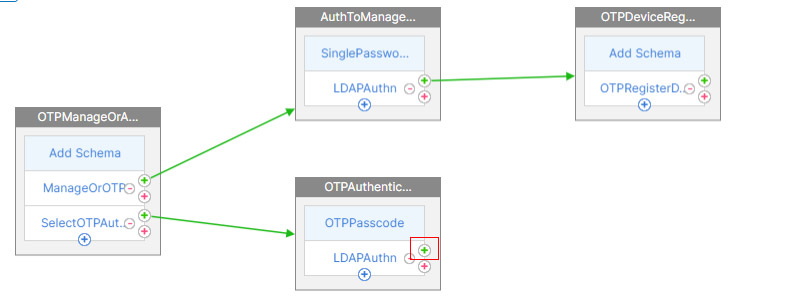
- You may notice that the 3rd factor is swapped like below.
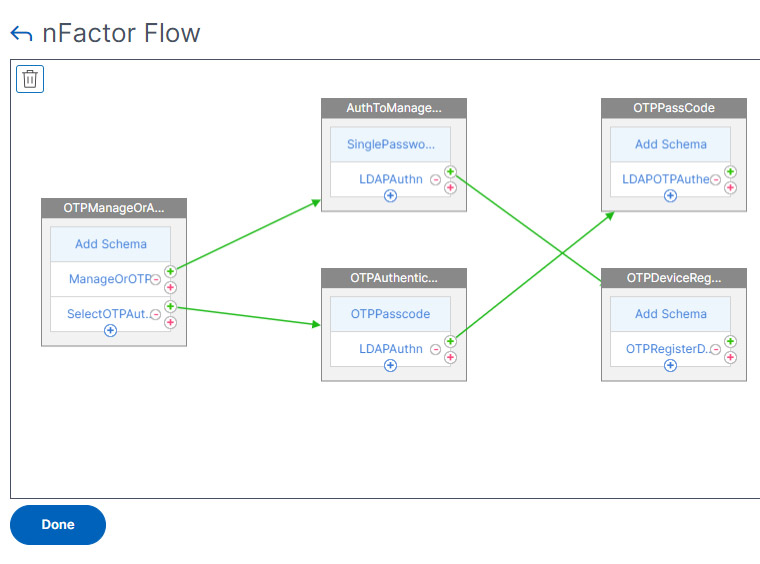
- Click Done.
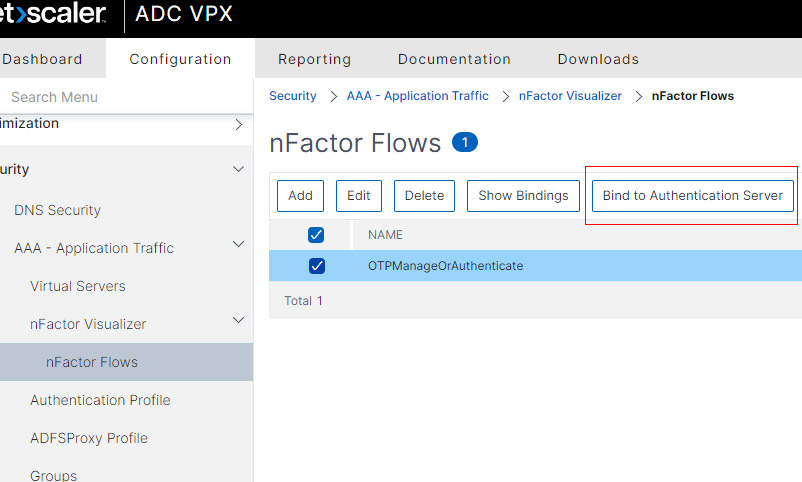
Bind nFactor Flow to AAA Virtual Server
- In the nFactor Flows menu select the Flow we created and Click Bind to Authentication Server
- Under Authentication Server bind the AAA server we created earlier.
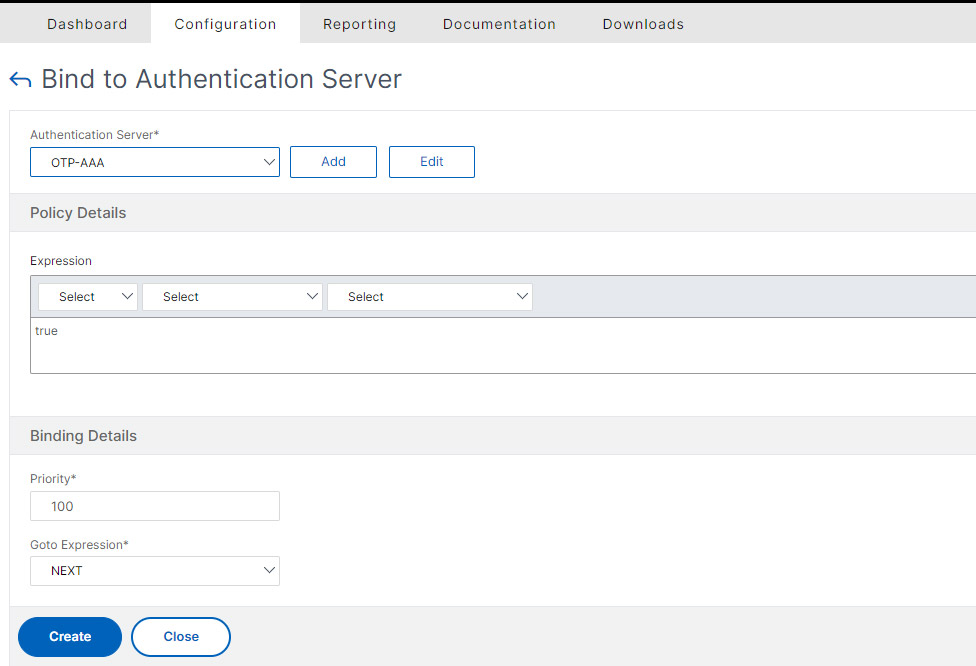
- Leave the rest and just click Create.
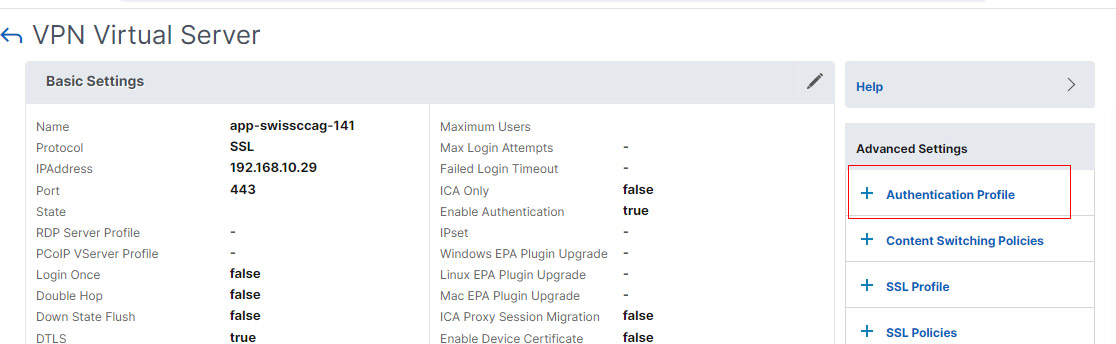
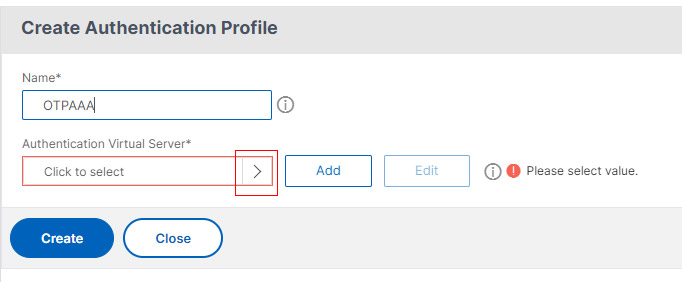
Create Authentication Profile
- Add New or Edit your existing Virtual server.
- From the right, click + Authentication Profile.
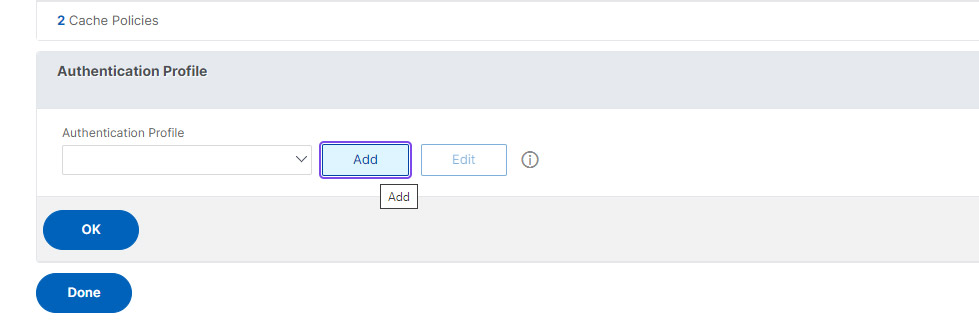
- From the Authentication Profile window, click Add.
- Name your Authentication Profile and click Select to choose the Virtual Server.
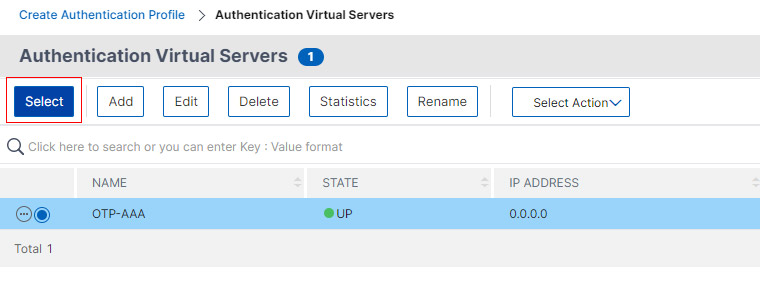
- Now Select the Authentication Server we created earlier and click Select.
- Click OK.
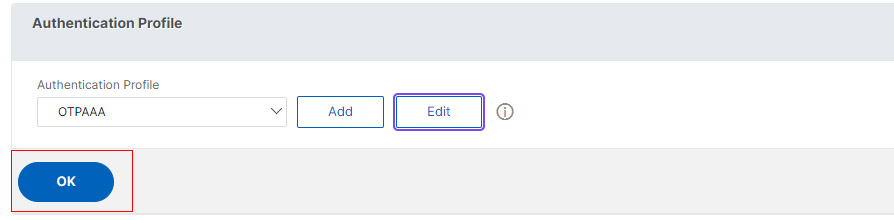
- Make sure the profile you created appears under Authentication Profile and Click OK.
- Click Done, we are set with ManageOTP schema.
Test your Manage OTP environment
To test the new schema, Go to your NetScaler virtual server URL as usual where you can see a new field called Passcode.
To test the Register device (ManageOTP) page type the URL like below,
Now you will get only username/password and by authenticating it will lead you to Register Device page which appears like below.

That’s all. This article applies to NetSclaer 13.x version as well.